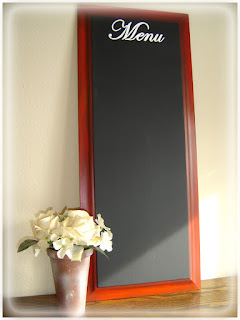
I found this cabinet door at a yard sale and noticed right away it was the perfect size for a chalkboard. The surface was great too...nice and smooth for writing lists, menus, doodling. Whatever makes you happy! The edges also had the look of a built-in frame which I really liked. I was able to finish off the sides with a different color to give it the look of a frame without having to actually frame it.
These are the supplies I used...
- Cabinet door (or you could use another smooth, flat surface)- Chalkboard paint
- Acrylic paint color(s) of your choice
- Paint brushes
- Primer
- Varnish
Since I worked with a wooden surface, I lightly sanded the work area so the paint would adhere easily. After wiping it clean I primed the entire surface. Now on to the blackboard paint, applying a few coats and allowing each coat to dry in between.

I trimmed the edges of my cabinet door with a red and brown acrylic paint mix. When dry, I used a dry brush and lightly painted red to add highlights.
I thought it would be a little more fun to add some wording at the top. "Menu" fit the kitchen theme I was going for. (I found a font on WORD I liked.) Other wording examples could be “To Do”, “Notes”, "Dream" or you can even personalize with children’s names.
When all paints were completely dry I applied a couple of coats of varnish to the edges where I added the acrylic paint.
You can ever create chalkboards on tiny surfaces, like this chalkboard tag I made from wooden circles I found at Michael's craft store. So easy! Then I added an extra touch by painting tiny roses.
But I made the mistake of hanging it by Lucy. Our fierce kitty doesn't let anything get by her!
Yep, she loves it!


No comments:
Post a Comment